Custom Providers
This guide explains how to add a custom Third-Party Provider to your Superflow Flow Builder. Providers are basically API endpoint Providers including the base settings for the connection, such as authentication, Base URL, headers and so on.
Custom Third-Party Providers and Actions are managed on the Workspace level. Changes affect all Apps within your Workspace as soon as they are republished.
Add a Custom Provider
- Navigate to the Flow Builders Actions Tap, scroll down to Third-Party Actions.
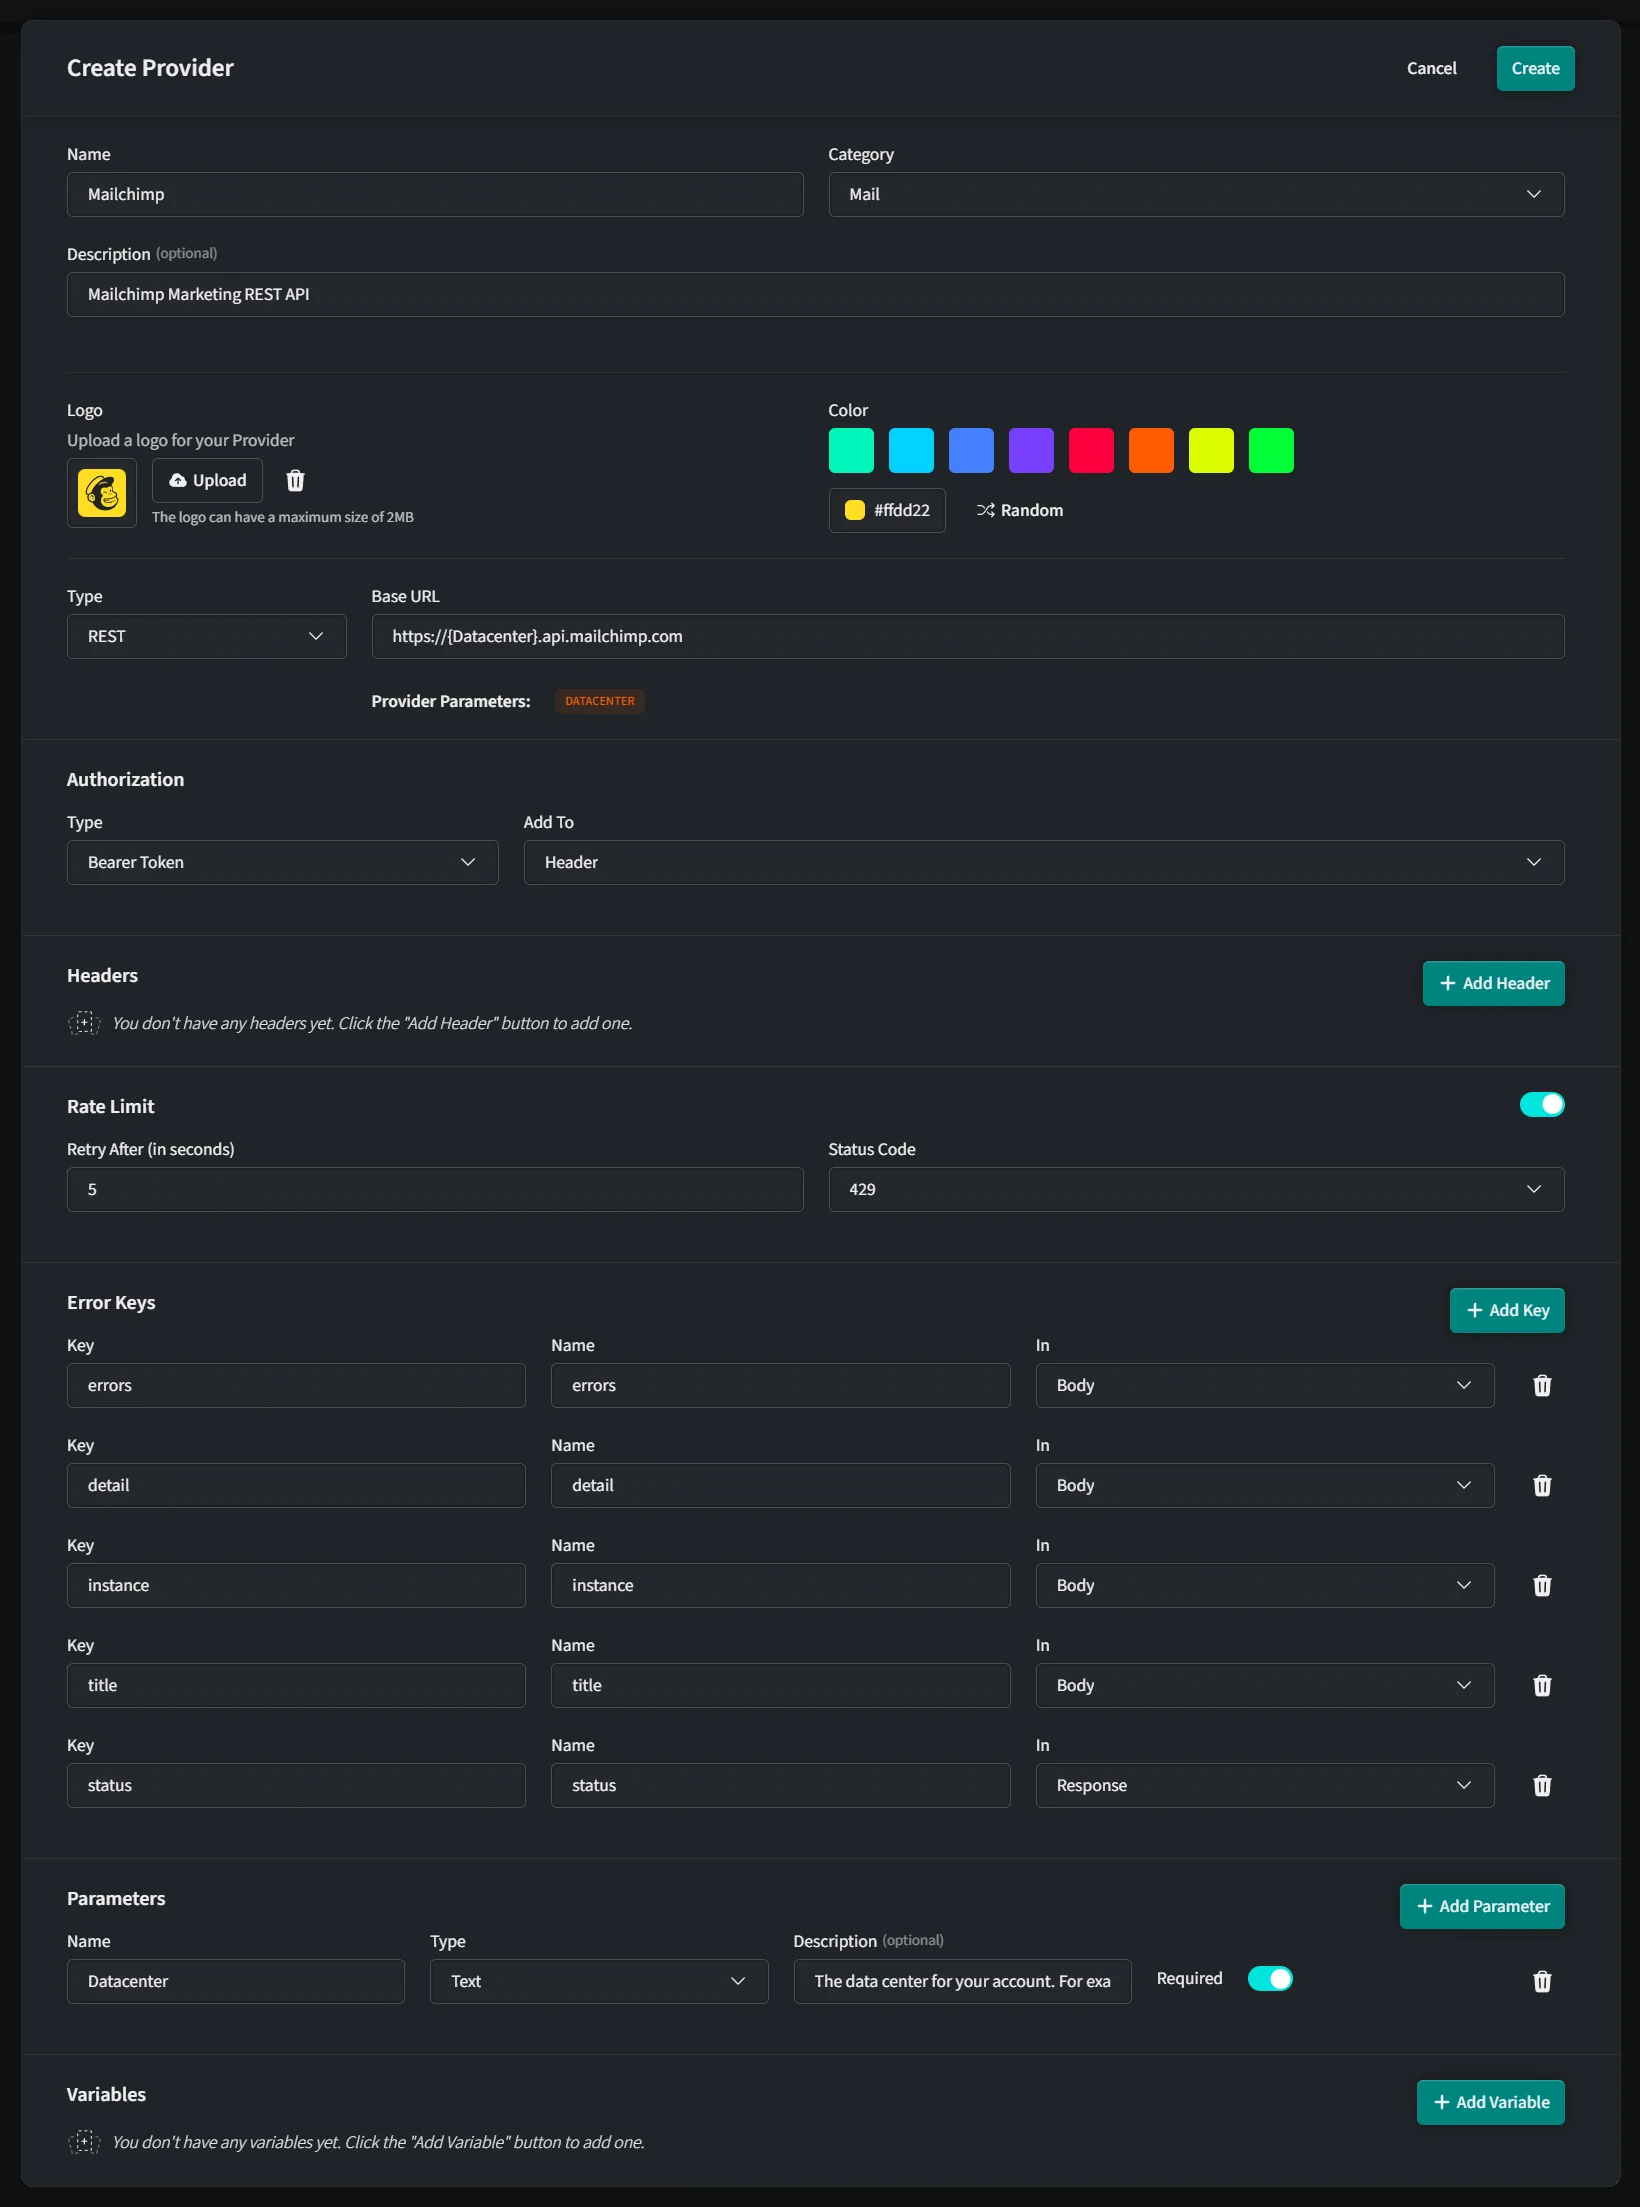
- Click on the “+” button to open the Provider settings dialog.

Basic Information
- Name: Enter the name of the Provider (e.g., Slack).
- Category: Select a category that best fits the Provider’s functionality.
- Description (optional): Provide a brief description, such as "Slack REST API".
Visual Customization
- Logo: Upload a logo for the Provider by clicking the “Upload” button. Ensure the image is within the size limit of 2MB.
- Color: Choose a color or click “Random” to auto-select one.
API Configuration
- Type: Select the type of API (e.g., REST or GrahQL).
- Base URL: Enter the Providers base API URL (e.g.,
https://slack.com/api).
You can also use Provider parameters and variables in the Base URL (e.g. https://{$datacenter}.api.mailchimp.com).
Best Practice: Don't include API versions in the Base URL (e.g. https://slack.com/api/v1). You might want to update the API version individually on an Action basis later on.
Authorization Settings
- Type: Choose the authorization method (e.g. API Key, Bearer Token ...).
Every type has individual sub settings.
Headers
- Click on “Add Header” to specify any additional headers required by the Provider.
Configure Rate Limiting
- Retry After (in seconds): Enter the time interval before retrying a failed request.
- Status Code: Enter the status code that indicates rate limiting (e.g., 429).
Error Keys
- Click on “Add Key” to map error keys and specify where to find them in the response (e.g., “error” key in the Body).
Parameters
Parameters will be available as Connection settings. You will need parameters for Providers with multiple connections wherever a user-specific value is needed in the URL or path of the API request.
For example, the Mailchimp API URL contains the Datacenter which is different for every user (https://{$datacenter}.api.mailchimp.com). Parameters can be used within Base URLs and within your custom Provider Actions.
- Add any necessary parameters by clicking “Add Parameter” and defining the name, type and an optional description.
Variables
Variables can be helpful for multiple use of the same values within your Actions. You can set and update the values globally in the Provider settings and use them within Base URLs and your custom Provider Actions.
- Click on “Add Variable” to define any variables needed for the API integration.
Save & Publish
Once all configurations are complete, click the “Save” button to finalize adding your Provider. Note that your new settings will only take effect when you republish your Apps.